What to do with leftover Glimma charm squares from the last quilt I made?
I love this fabric, and I wanted to make something with it that I would be able to use and enjoy.
My "quilt inspector" cat is also a "yoga mat inspector." She managed to "try out" my yoga mat within 5 minutes of me bringing it home this summer (the yoga mat usually stays in my office, but the building is being renovated this summer).
So, it seemed like a good idea to make a nice hoagie-shaped bag for my yoga mat and towel to prevent further "inspection."
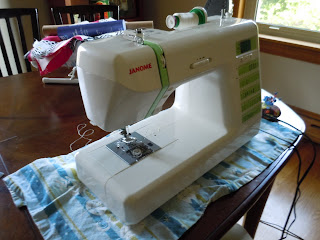
This is the first project for me using my new Janome sewing machine (DC2012 on sale!)
I did not use a pattern to make the bag, but I was inspired by
Jane's Girl Designs Tutorial based on an
Amy Butler pattern.
I started by measuring the length of my loosely-rolled yoga mat. Then, I added a few inches to the length to get the length of the bag because I wanted a little extra room in there for a yoga towel and maybe a water bottle.
For the bag ends, I just went around the house looking for circular templates that were bigger then the loosely-rolled end of my yoga mat, but not too big. I found a small mixing bowl that worked, and used it to trace circles on the blue solid Glimma fabric for the ends of the bag.
I decided I wanted to do a quilt-as-you go bag because I wanted to try quilting on my new machine, and because I thought the bag needed some reinforcement beyond normal quilting cotton fabric. You can see in the picture above that I also cut circles of the yellow lining fabric and batting circles at the same time. I cut the blue and yellow fabrics about 1/4" wider than the original circle, so that I could sew the ends to the sides of the bag later. Then I quilted each of these circles.
The sides came together from my remaining Glimma squares and some extra blue fabric.
I made two rectangle-shaped sandwiches of Glimma, batting, and lining fabric- one for each side of the zipper in the top of the bag. I quilted each of these as well. I made sure the rectangles were wide enough so that when put together they would have plenty of overlap around the circumference of the bag (ie, I could cut the extra material away when I sewed them together).
I basted the two rectangles together on one side, and then installed a 24" zipper in the basted side, like I was sewing a zipper into a dress (see
this cool tutorial by Make it & Love it for instructions).
At this point, it was about 10:30 at night, I had a 17-year-old wanting help on designing letters for a sewing project she was working on, it was yukky hot even in the house, and I lost patience for taking more pictures.
The next steps were: adding a small strap to each of the round ends of the bag;
Then assembling the ends and sides together. This is a little fidgety- I pinned one end to the sides to see how much extra fabric I had on each side, then carefully marked the seam location on each rectangle, sewed them together, and then cut off the excess fabric. Then, I went back and pinned the ends to the sides again and sewed the ends to the sides.
I always thought it would make sense to use a yoga strap as a bag strap, so I wanted to try to make my own yoga strap and make it into a detachable handle for the bag. It's really easy- just buy D-rings from your local craft store, measure and sew together at least two layers of fabric using plenty of quilting, then stitch off one end of the strap and add the D-rings to the other end.
The strap attaches to the bag by slipping it through the loops on both ends of the bag and using the D-rings to attach the strap to itself.
Yay! Now to try it out at yoga class today.


